
Tools you’ll need
- — Level
- — Tape measure
- — Pencil
- — Damp cloth
Materials
- Pine shelf boardPre-cut at hardware store2 × 24"
- Heavy-duty mounting stripsRated 15 lb each8
- Wood stain or paint1 small can
- Foam brush1
Step by step
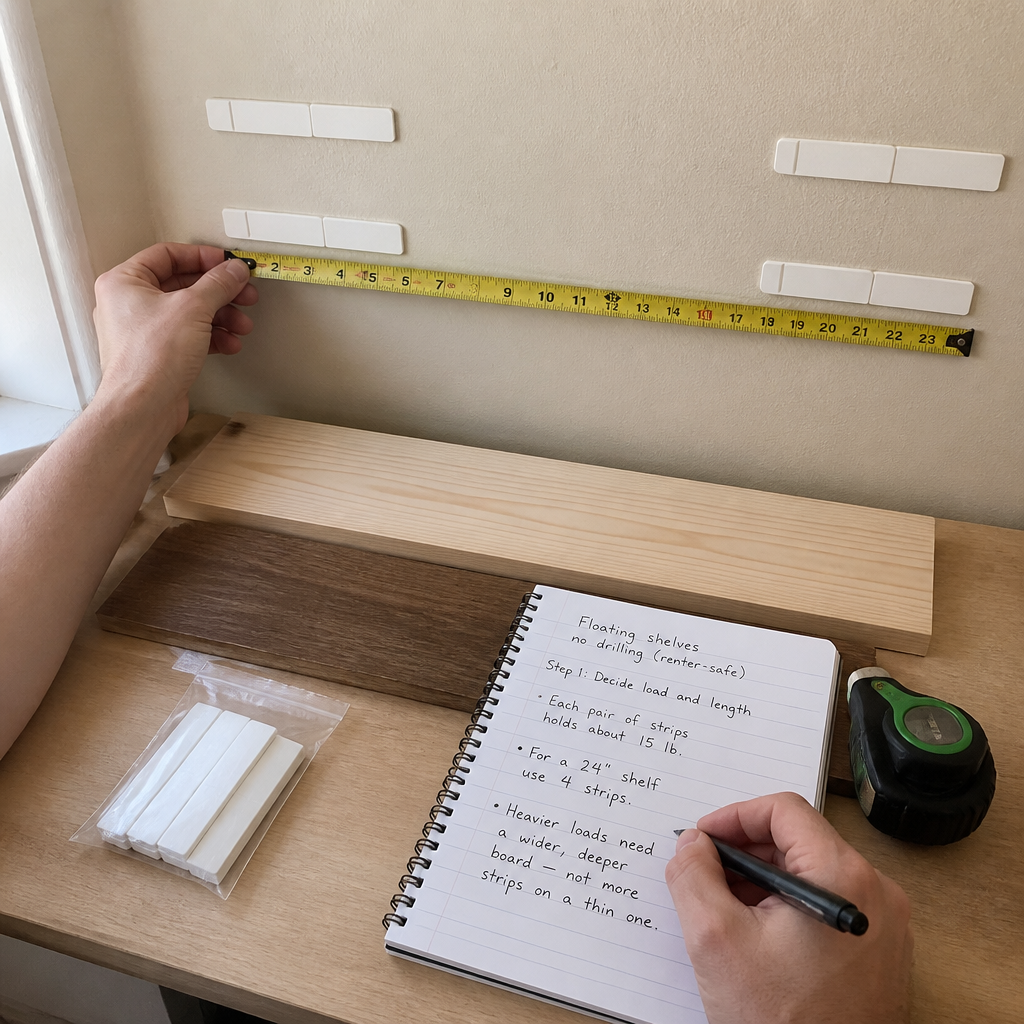
- 01
Decide load and length
Each pair of strips holds about 15 lb. For a 24" shelf use 4 strips. Heavier loads need a wider, deeper board — not more strips on a thin one.
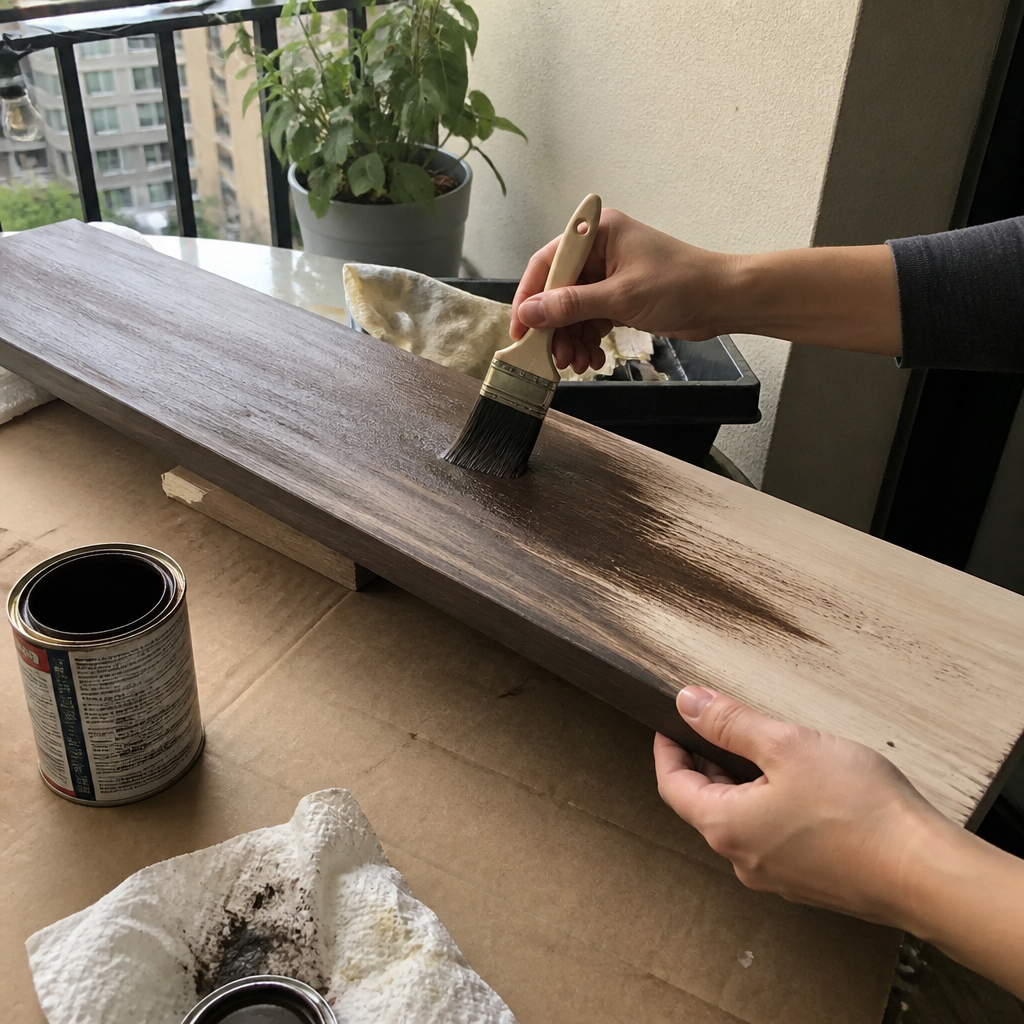
- 02
Stain or paint the board
Do this on a balcony or with the window open. One light coat, let dry 30 minutes, second coat. Skip if you bought a pre-finished board.
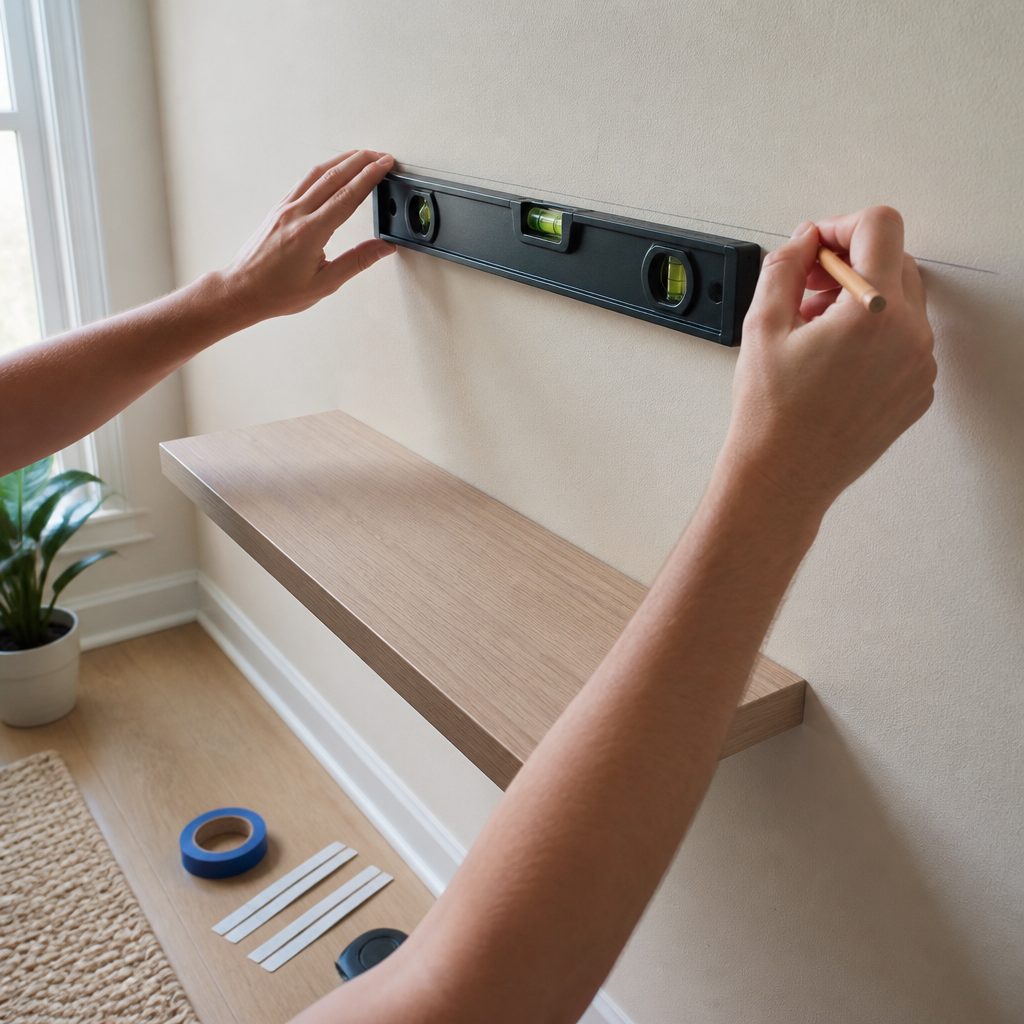
- 03
Mark the line with a level
Hold your level against the wall and draw a pencil line where the top of the shelf will sit. Eyeballing it is the #1 mistake.
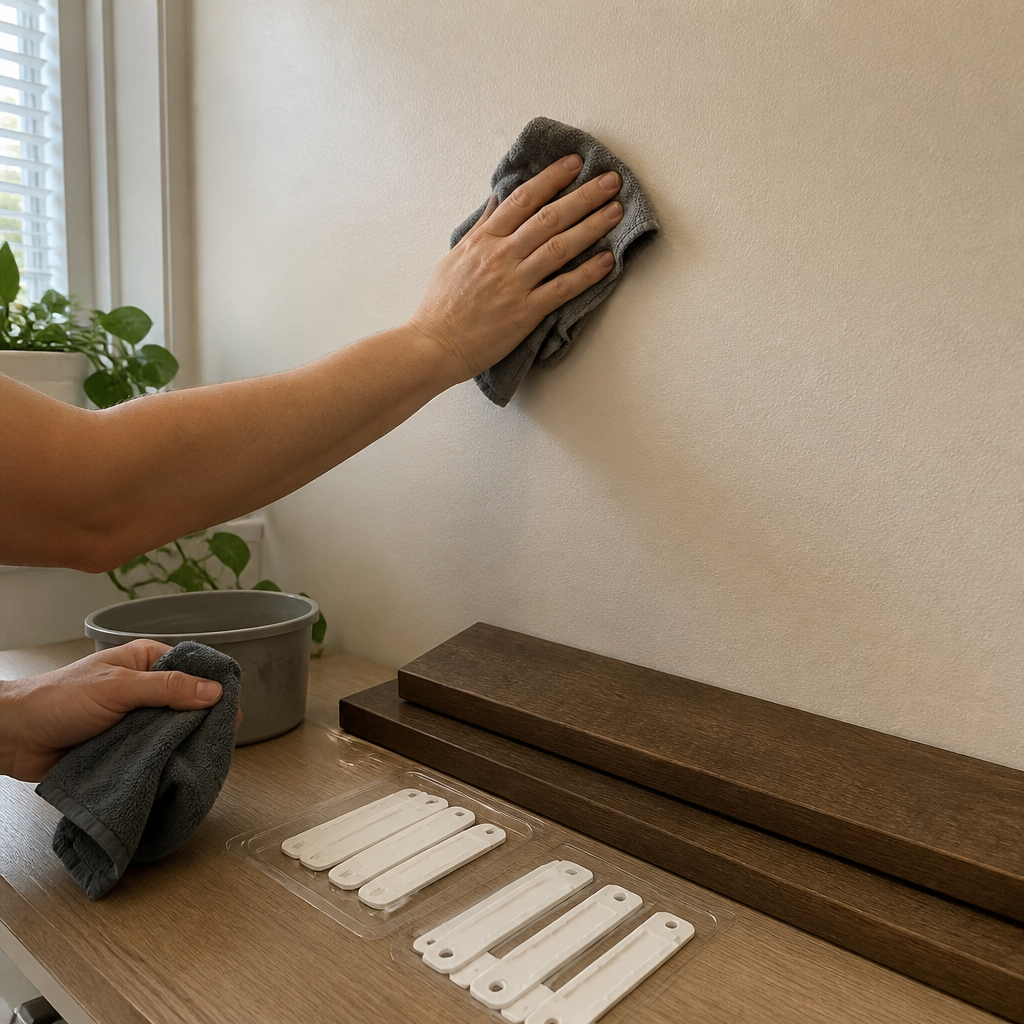
- 04
Clean the wall
Wipe the wall with a damp cloth, then dry completely. Strips fail on dusty or freshly painted (< 30 day) walls.
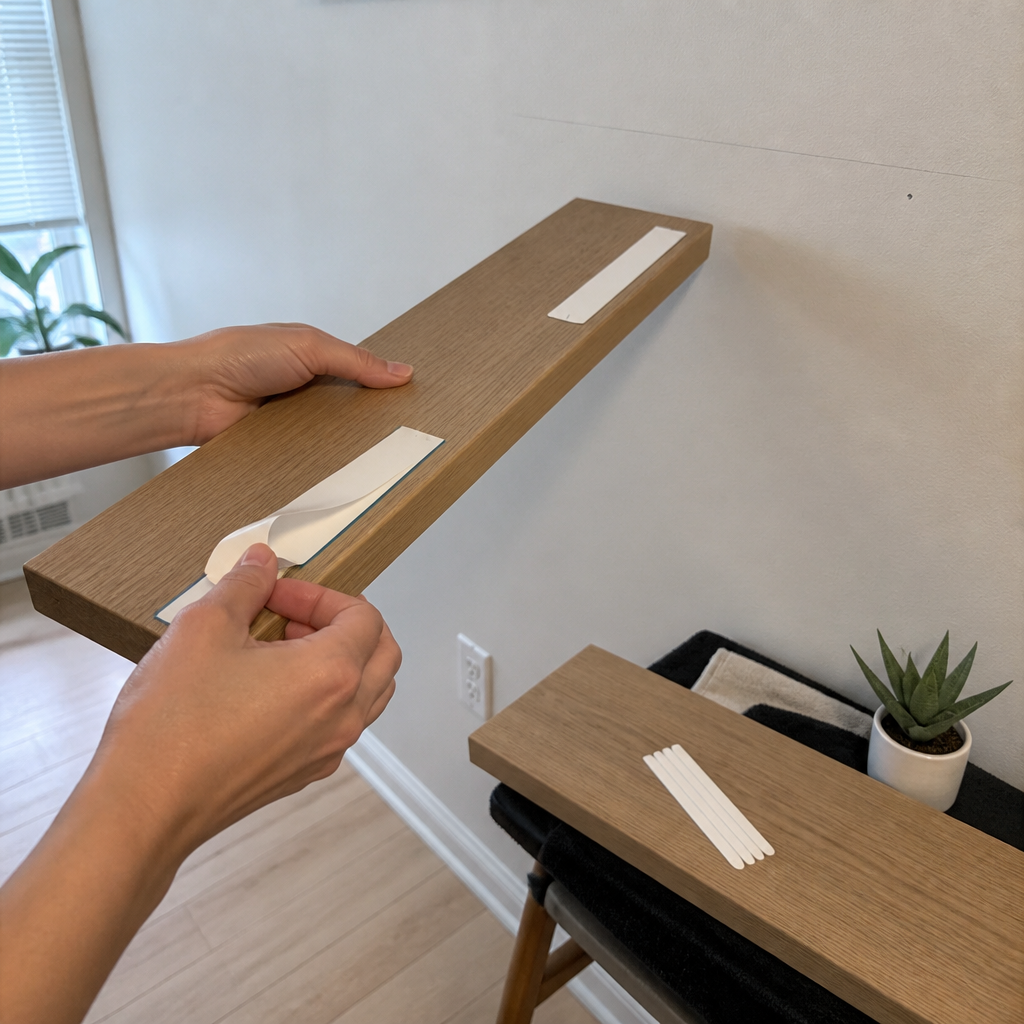
- 05
Press strips onto the shelf, then the wall
Peel one side, stick to the shelf back. Peel the other, press the shelf to the wall firmly for 30 seconds per strip.
- 06
Wait 1 hour before loading
The adhesive needs to cure. Load light items first — books and heavy ceramics after a full day.

Mistakes to avoid
- Using strips on textured or freshly painted walls
- Loading heavy items before the adhesive cures
- Removing by pulling outward instead of straight down the wall
If you can’t drill, cut, or paint…
- If your walls are textured: use a tension-rod shelving system instead
- For heavier loads: try a leaning ladder shelf — no wall contact needed
- For kitchens: over-the-door wire racks work without any adhesive
Shopping list
- Pine board, 1×8 × 24"
- Command large picture hanging strips (8-pack)
- Minwax stain in Special Walnut
- Foam brushes (3-pack)